You can upload any list of contacts into your Remarkety account and then target these people as part of your email marketing strategy.
Before uploading, please ensure the following rules are met. And please note, if you’re currently on a free trial, you cannot upload more than 1,000 contacts.
- Email Address: Each email address should be in a new line of the same column.
- CSV: List must be saved as a comma separated file
- Under 10MB: CSV must be under 10MBs or 50,000 contacts
- Allowed built-in Fields/Columns:
- Email (Required)
- Website Shopper ID
- POS ID
- Registration date (Format: Date and Time. Example: 2014-07-21 14:56:11)
- Birthdate (Format: Date and Time. Example: 2014-07-21)
- First name (Format: Text)
- Last name (Format: Text)
- Company (Format: Text)
- Street (Format: Text)
- City (Format: Text)
- Phone (Format: Text, Example: 6466561234, +16466561234)
- Country code (Format: Text. Example: UK, US, FR, IN)
- State/Region (Format: Text)
- Zip code (Format: Text)
- Gender (Format: U - unknown, M - male, F - female)
- Email Opt-in status (Format: 0 or 1)
- Is Guest (Format: 0 or 1)
- Rewards Points (Format: Number)
- SMS Phone Number e164 (Must be in e164 format. Example: +16466561234)
- SMS Consent Status
- SMS Consent Date (Format: Date and Time. Example: 2014-07-21 14:56:11)
- SMS Consent Source (Format: Text. Example: Website, Landing page X, Form 123)
- Tags (Format: Text. Separated by ; if more than one)
- Last sent date (Format: Date and Time. Example: 2014-07-21 14:56:11)
- Last opened date (Format: Date and Time. Example: 2014-07-21 14:56:11)
- Last clicked date (Format: Date and Time. Example: 2014-07-21 14:56:11)
* E.164 is an international standard, titled The international public telecommunication numbering plan, that defines a numbering plan for the worldwide public switched telephone network and some other data networks. E.164 defines a general format for international telephone numbers. Learn more about it here.
- There is an option to upload custom fields as well. Click here to learn more about how to upload custom fields.
How to upload a CSV file?
1. Click on the Contacts icon on the top right corner of your Remarkety dashboard and choose Contacts List.
2. From the Contacts List page, select the Upload from file button on the top of the page. This will redirect you to a new page.
3. Give your list a tag (optional).
This tag is the same thing as a title. You can create a new tag or use an existing one to add more contacts to a specific existing tag. This tag will be used later if you want to segment a campaign and send it only to this list of contacts (by using the “Customer’s tag” condition in the campaign segmentation).
3. Click on the “Choose File” button to find the file on your computer.
4. Click the “Upload” button.
5. On the next screen you’ll need to tell us which data can be found in each column. For example, Column #1 is the customer first name, Column #2 is last name, Column #3 is email address, and so on. You can choose to ignore non-relevant columns by choosing the “Nothing (skip)” option. After completing this step click on the “Finish adding subscribers” button.
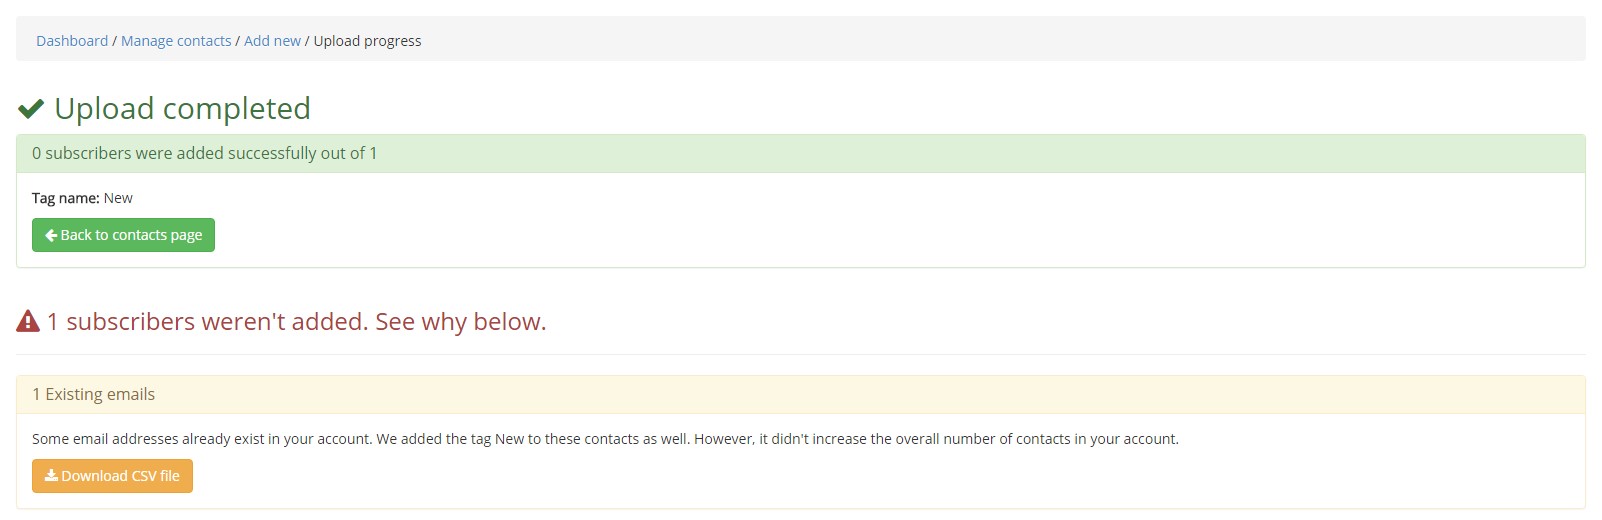
6. Your list will now be uploaded. Bigger lists might take a few minutes to finish uploading. After all the contacts are uploaded, the system will display the result:
- New contacts
- Duplicates
- Invalid Emails
That's it. You are all set.
Thank you,
The Remarkety Team
Comments
0 comments